Truthfully, they can be a hassle. And most people would rather just make a garment to fit rather than alter another whose construction may, or may not be compatible with the wanted alteration.
I happen to be one of the few people who still do alterations. Mainly because I'm used to altering everything I buy because I'm very narrow-backed and everything falls off my shoulders.
However, a common problem people experience is that they find a "fitted" top that fits fine in the shoulders but not in the waist.
The technique I'm going to show can also be used to make a regular t into a babydoll.
I'm demonstrating on a button down, simply because it was easier to work with, but this method can be transferred to virtually any blouse with straight side seams.
Materials:
Blouse that you want to be fitted.
Pins
A marking pen
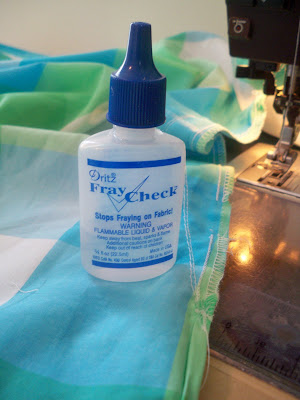
Fray Check
Thread
Scissors
Sewing Machine
Serger(optional, but always a great thing to have in your arsenal of sewing supplies)
The first thing you'll want to do is measure and pin how much you want the curve to take in. Something like this:
Make sure that your curve is gradual, starting from under the sleeve and ending at the hem.
Next, Draw a line where the shirt is pinned:

Here I used the purple "disappearing" ink pen because the line is only need for a short amount of time.
Now run a basting thread along the line you've drawn. This is a precautionary step so that you can check the fit before continuing:

In the case of this shirt, the care tag is in the side seam. Use a thread pick and take it out now to get it out of the way.

Now before you set it down someplace (lets face it... some of those suckers are freakin tiny) go ahead and pin it somewhere in the middle of the garment. I prefer center front where you can miss it. (im apt to overlooking things like that at times)

Once you've check the fit run a regular line of stitching alongside the basted line:

Clip the line of stitching threads. But NOT the basting threads yet. Fray Check the stitching line to prevent pulling stitches later when you wear it.
I doubt I would be able to function without Fray Check in my inventory. It's great for working with fabrics that fray easily and saving a otherwise ruined seam.
The next step is to trim the excess away from the stitching line. Because inside curves are so hard to sight, trimming gives you a clear mark. Make sure you leave plenty of space for your serge seam to finish the edge:

Now is a good time to go ahead and pull out your basting threads. Or you can wait until after you serge, its really up to you.
From here, finish the edge with a basic three thread serge. Three thread serge seams, while excellent for finishing a seam, they aren't the most sturdy of seams, which is why the other line of stitching was put in.

For this seam I disengaged my blade, since I already trimmed the seam. This way if a mistake was made it would be easily reversible.
Your finished seam will look something like this:

Now just a quick press:

And Viola!
You now have a fitted blouse, and only you know that it wasn't bought that way!
Enjoy!


such a hard process to do! you seem to know it very well, keep up the great work... :)
ReplyDelete